Beginner's Guide to Perfect Omelette Techniques
perfect omelette techniques

Beginner's Guide to Perfect Omelette Techniques

Unlock the secrets to consistently making light, airy, and delicious omelettes with ease.

Start Cooking Now

Key Takeaways

  • ✓ The right pan and heat control are crucial for omelette success.
  • ✓ Whisking eggs properly incorporates air for a fluffy texture.
  • ✓ Gentle handling and patience prevent tearing and overcooking.
  • ✓ Omelettes are a versatile, nutrient-dense meal option.

How It Works

1
Gather Your Ingredients and Tools

Ensure you have fresh eggs, your preferred fillings, a non-stick pan, and a rubber spatula ready. Preparation is key to a smooth cooking process.

2
Master the Egg Mixture

Whisk your eggs thoroughly with a splash of liquid until frothy, but not over-aerated. This creates the foundational texture for a perfect omelette.

3
Perfect Your Pan Temperature

Heat your non-stick pan over medium-low heat with a small amount of fat. The ideal temperature ensures even cooking without browning too quickly.

4
Fold and Serve with Confidence

Pour eggs, let set, then gently push cooked edges towards the center, tilting the pan to allow uncooked egg to flow underneath. Add fillings, fold, and serve immediately for optimal enjoyment.

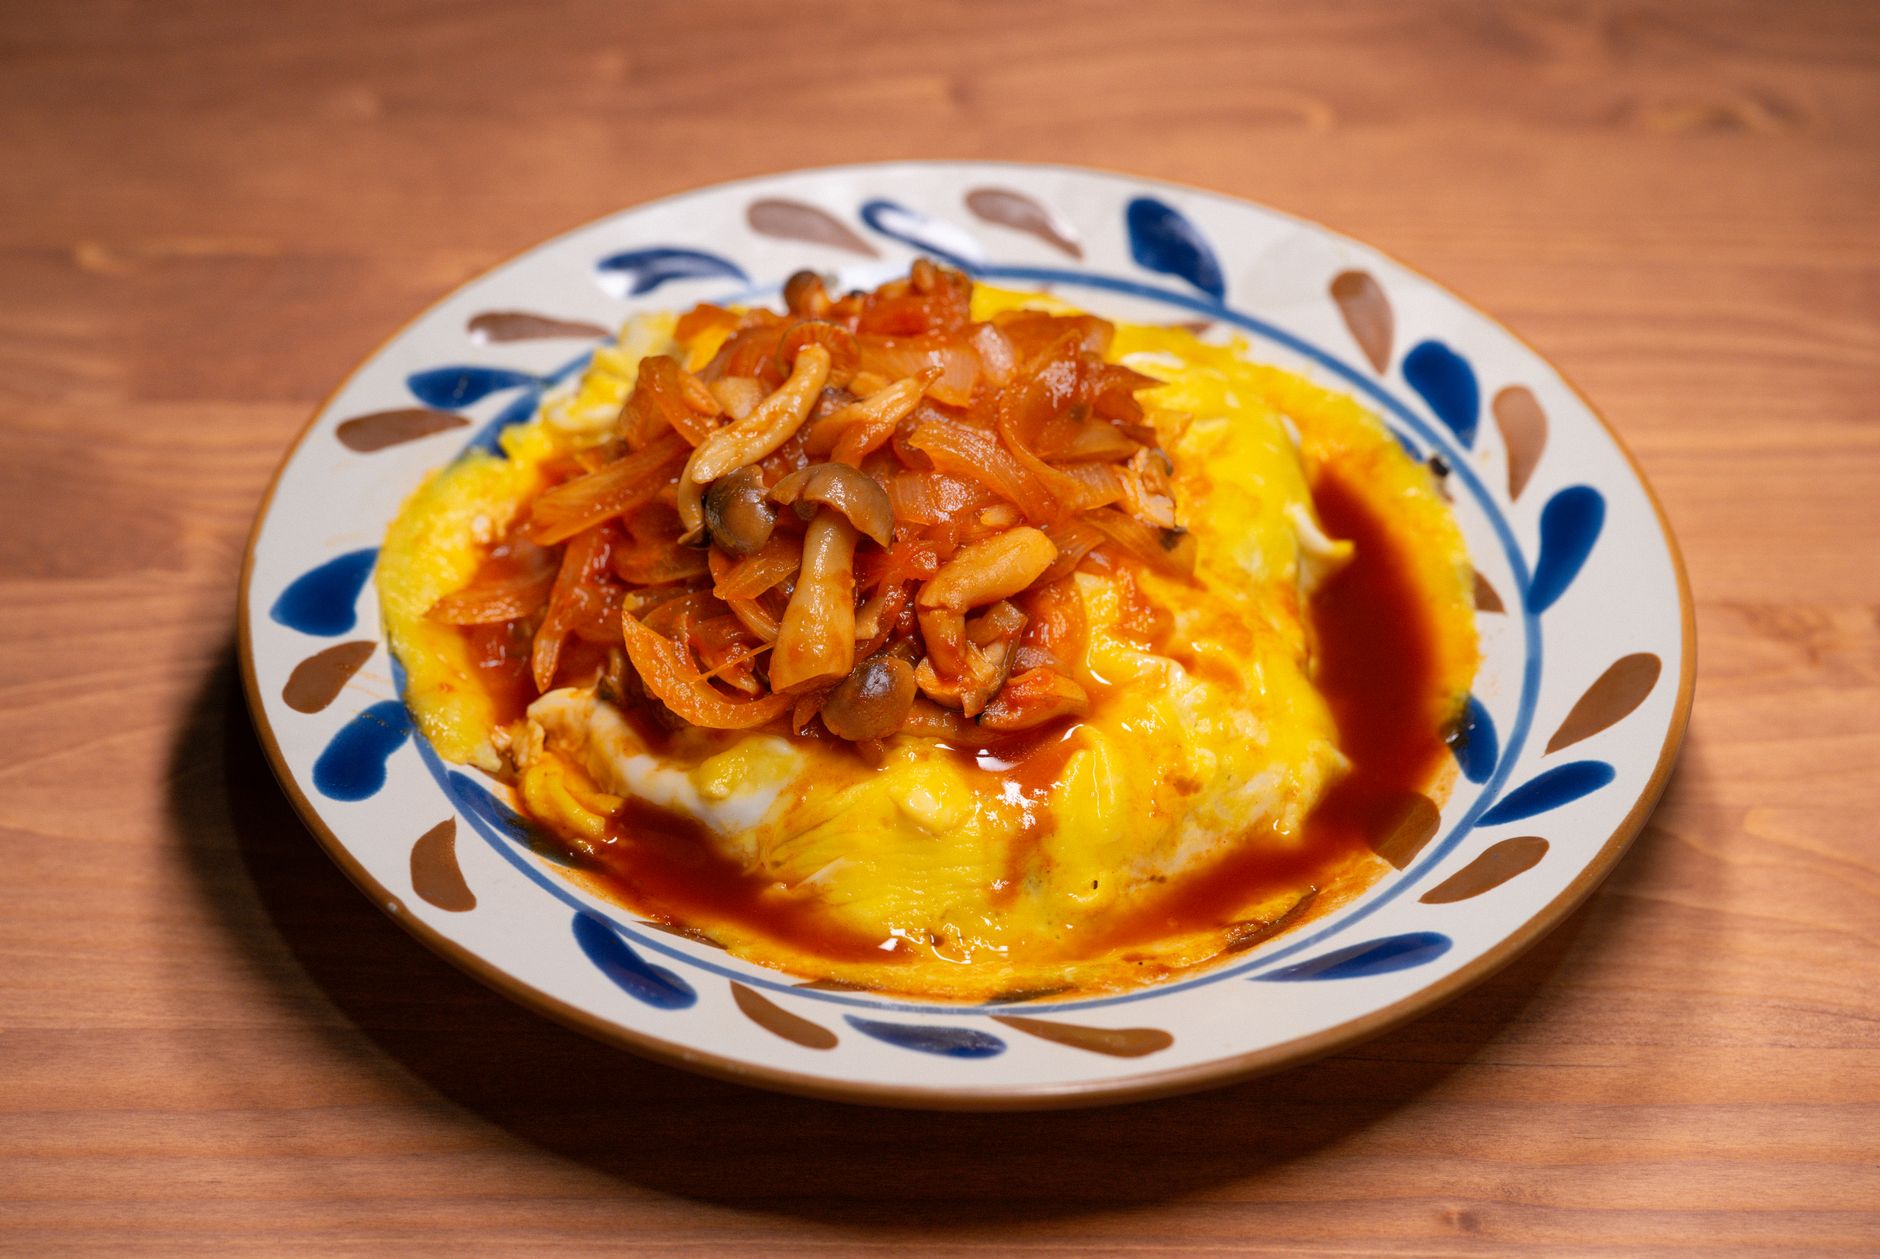
Understanding the Fundamentals of Omelette Mastery

Crop anonymous cook with knife and fork cutting yummy hot egg roll on wooden board 
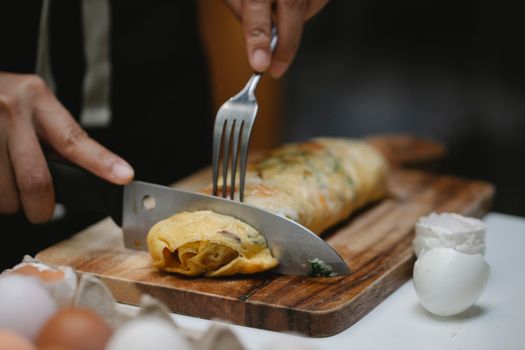
Photo: Klaus Nielsen / Pexels
Embarking on the journey to craft the perfect omelette is a culinary rite of passage for many, and it's a skill that, once mastered, opens up a world of quick, nutritious, and delicious meal possibilities. An omelette isn't just cooked eggs; it's a delicate balance of technique, timing, and temperature that results in a light, fluffy, and satisfying dish. For those new to the kitchen or looking to refine their breakfast repertoire, understanding the foundational principles is paramount. This isn't about simply scrambling eggs; it's about creating a cohesive, tender egg canvas that can beautifully encase a variety of fillings, making it an incredibly versatile meal for any time of day, not just breakfast. From a medical and nutritional standpoint, eggs are a powerhouse of protein, essential vitamins (like B12 and D), and minerals, making omelettes an excellent choice for maintaining muscle mass, supporting bone health, and providing sustained energy. They are particularly beneficial for individuals managing blood sugar levels due to their low glycemic index and high protein content, which promotes satiety. Incorporating lean proteins into your diet is a cornerstone of good health, and eggs offer an accessible and affordable option. The initial step in achieving omelette mastery lies in selecting the right ingredients and equipment. Fresh, high-quality eggs are non-negotiable; they contribute significantly to the flavor and texture of the final product. While specific types of eggs (e.g., pasture-raised, organic) can offer enhanced nutritional profiles, any fresh egg will suffice for learning the technique. Beyond the eggs, the choice of pan is critical. A good quality non-stick pan, ideally 8-10 inches in diameter with sloped sides, is essential. The non-stick surface ensures the omelette releases cleanly, preventing tearing and making the folding process much easier. The sloped sides facilitate the gentle movement of the eggs and the final fold. A rubber or silicone spatula is also a must-have tool, as it allows you to manipulate the eggs without scratching your non-stick pan or breaking the delicate egg structure. Lastly, having your chosen fillings prepped and ready before you even crack an egg is a golden rule. This mise en place approach minimizes stress and ensures that once the eggs hit the hot pan, your focus can be entirely on the cooking process itself. Rushing to chop vegetables or grate cheese while your omelette is cooking is a recipe for disaster, leading to overcooked eggs and a less than perfect outcome. Taking the time to understand these basic requirements sets the stage for consistent success and elevates your omelette from a simple breakfast item to a culinary triumph that can be enjoyed as a light lunch or even a quick, healthy dinner.

The Art of Whisking and Temperature Control

The seemingly simple act of whisking eggs holds profound importance in the creation of a perfect omelette. It's not just about breaking the yolks; it's about incorporating just the right amount of air to achieve that coveted light and fluffy texture, while also ensuring a homogenous mixture. Over-whisking can introduce too much air, leading to a foamy, brittle omelette that lacks structure, while under-whisking leaves streaks of egg white and yolk, resulting in an uneven texture. The ideal whisking involves using a fork or a small whisk to beat the eggs until they are uniformly colored and slightly frothy, but not bubbly. A splash of liquid – water, milk, cream, or even a dash of stock – can be added to the eggs before whisking. This liquid helps to create steam during cooking, which contributes to the omelette's tenderness and prevents it from becoming rubbery. For a two-egg omelette, about half a tablespoon of liquid is usually sufficient. The goal is to break down the proteins just enough to create a smooth, pourable consistency that will set evenly in the pan. Equally critical to whisking is mastering temperature control. This is often where beginners falter, leading to tough, browned, or undercooked omelettes. The temptation to crank up the heat for faster cooking should be resisted at all costs. An omelette requires a gentle, consistent heat, typically medium-low. This allows the eggs to cook through slowly and evenly, setting from the bottom up without burning or drying out. Before adding the eggs, the pan should be heated with a small amount of fat – butter, olive oil, or a cooking spray – until it shimmers but isn't smoking. Butter is a classic choice for its flavor, but it's important to use it sparingly to avoid a greasy end product. The pan should be hot enough to immediately start setting the eggs, but not so hot that they sizzle aggressively and cook too quickly. A good test is to drop a tiny bit of egg mixture into the pan; if it immediately sets but doesn't brown, the temperature is just right. If it browns instantly, the pan is too hot. If it just sits there, it's too cold. Consistent heat ensures that the omelette cooks through without developing a tough skin or remaining runny in the center. This delicate balance of whisking and heat management transforms raw eggs into a culinary masterpiece, showcasing the art of controlled cooking and precision.

Our partners at monkey-app.net offer related services.

The Perfect Pour, Set, and Fold: Assembling Your Omelette

Once your eggs are perfectly whisked and your pan is at the optimal temperature, the next steps involve the careful pour, the delicate setting, and the confident fold – the true heart of omelette construction. Pour the egg mixture into the heated pan in one smooth motion. The eggs should immediately begin to set around the edges. This is your cue to begin the gentle manipulation. Using your rubber or silicone spatula, push the cooked edges of the omelette towards the center of the pan, allowing the uncooked liquid egg to flow into the newly created space underneath. Tilt the pan as you do this to help spread the raw egg evenly. Repeat this process around the entire circumference of the omelette, working quickly but gently. The goal is to cook the eggs until they are mostly set but still slightly moist and creamy on top; this ensures a tender interior that won't be dry or rubbery. This stage usually takes only 1-2 minutes, depending on your heat and pan size. Overcooking at this point is a common mistake that leads to a dry, unappealing omelette. Learning proper cooking techniques can significantly impact both the taste and nutritional value of your meals. When the top surface of the omelette is still slightly wet but no longer visibly liquid, it’s time for the fillings. Add your pre-prepared fillings – cheese, cooked vegetables, herbs, or lean meats – to one half of the omelette. Distributing them evenly ensures every bite is flavorful. Avoid overfilling, as this can make the omelette difficult to fold and may cause it to tear. The heat from the pan and the residual heat from the eggs will gently warm your fillings. Finally, the fold. This is the moment of truth. Using your spatula, gently lift one side of the omelette and fold it over the fillings to meet the other side. Alternatively, you can slide the omelette to the edge of the pan and then fold it over onto itself, allowing it to slide directly onto a waiting plate. The key is to be swift and confident, minimizing any hesitation that might cause the omelette to stick or break. A perfectly executed fold results in a neat, crescent-shaped omelette with a slightly golden exterior and a tender, moist interior. Serve immediately to enjoy the omelette at its peak texture and warmth. Practice makes perfect with the fold; don't be discouraged if your first few attempts aren't picture-perfect. The flavor will still be there, and with each attempt, your technique will improve, leading to consistently beautiful and delicious omelettes.

Advanced Tips and Common Omelette Mistakes to Avoid

Once you've mastered the basic techniques, you can elevate your omelette game with a few advanced tips and by being aware of common pitfalls. These insights will help you consistently produce restaurant-quality omelettes. **Advanced Tips for Omelette Perfection:** * **Emulsified Butter:** For an extra luxurious omelette, try emulsifying a small amount of cold butter into your whisked eggs. This creates an even richer flavor and silkier texture. * **Seasoning Layers:** Season your eggs with salt and pepper before whisking, but also consider a light sprinkle of salt and pepper on the surface of the omelette just before folding for an extra burst of flavor. * **French vs. American Style:** Understand the difference. A classic French omelette is typically rolled, has a very pale, almost unbrowned exterior, and a creamy, slightly runny interior. An American-style omelette is usually folded in half or thirds, often has a slightly more set interior, and can have a hint of golden color on the outside. Experiment to find your preference. * **Herb Infusion:** Fresh herbs (chives, parsley, dill) can be whisked directly into the eggs or sprinkled over the top just before folding for vibrant flavor and color. * **Pre-Cooked Fillings:** Ensure all fillings are cooked and warmed through before adding them to the omelette. Cold or raw fillings will cool down your omelette and may not cook through properly in the short cooking time. **Common Omelette Mistakes to Avoid:** * **Overheating the Pan:** This is perhaps the most frequent mistake. Too high heat leads to browned, tough, and rubbery eggs. Always err on the side of lower heat. * **Over-whisking Eggs:** While air is good, too much air makes the omelette fragile and prone to tearing. * **Overcooking the Omelette:** The eggs should be just set, with a slightly moist sheen on top. A dry omelette is an overcooked omelette. * **Using Too Much Fat:** While fat adds flavor and prevents sticking, excessive amounts can make the omelette greasy. A small amount is all that's needed. * **Impatience:** Omelette making requires a gentle hand and a bit of patience. Rushing the process, whether whisking, setting, or folding, can lead to a less than perfect result. * **Overfilling:** Too many fillings make the omelette difficult to fold and can cause it to break apart. By keeping these tips and common errors in mind, you'll not only refine your technique but also gain a deeper appreciation for the nuanced art of omelette making, leading to consistently delicious and visually appealing results.

Comparison

FeatureBest OptionAlternative 1Alternative 2
Pan Type8-10 inch Non-stickCast Iron (well-seasoned)Stainless Steel (higher skill)
Fat for PanUnsalted ButterOlive OilCooking Spray
Liquid in EggsWater (1/2 tbsp/2 eggs)Milk/Cream (1/2 tbsp/2 eggs)No Liquid (dense omelette)
Spatula MaterialRubber/SiliconePlasticMetal (can scratch non-stick)

What Readers Say

"This guide completely changed my omelette game! My eggs used to stick and break, but now they're perfectly fluffy every time. The temperature control tips were a revelation."

Sarah J. · Austin, TX

"As a busy professional, I needed quick, healthy meal ideas. This guide helped me master omelettes, making them a go-to for nutritious breakfasts and even quick dinners."

Mark D. · Chicago, IL

"The emphasis on proper technique yielded immediate results. My omelettes are no longer rubbery; they're tender and delicious, significantly improving my morning routine."

Dr. Emily R. · Boston, MA

"Great tips, especially about the amount of liquid. My omelettes are much better, though I'm still working on the perfect fold. Practice makes perfect, as they say!"

Carlos M. · Miami, FL

"I used to think omelettes were too complicated, but this guide breaks it down perfectly. Now I can impress my family with homemade omelettes that are healthier than takeout."

Jessica L. · Seattle, WA

Frequently Asked Questions

What is the best type of pan for making a perfect omelette?

A non-stick pan, ideally 8-10 inches in diameter with sloped sides, is highly recommended. The non-stick surface prevents sticking and tearing, while the sloped sides make it easier to manipulate and fold the omelette. Ensure it's in good condition with no scratches.

My omelettes always stick to the pan, what am I doing wrong?

Sticking is usually due to an inadequate non-stick surface, not enough fat in the pan, or the pan not being hot enough when the eggs are added. Ensure your pan is truly non-stick, use a small amount of butter or oil, and heat it until shimmering before pouring the eggs.

How do I make my omelette light and fluffy instead of dense?

Achieving a light and fluffy texture comes from properly whisking the eggs to incorporate some air without over-foaming, and by adding a small splash of liquid (like water or milk) to the eggs before whisking. This liquid creates steam, which helps to puff up the omelette.

Is it worth investing in special omelette tools?

While a good non-stick pan and a rubber spatula are essential investments, you don't necessarily need 'special' omelette tools. The core techniques can be mastered with standard kitchen equipment. Focus on quality over specialized gadgets.

How does a French omelette differ from an American omelette?

A French omelette is typically rolled, has a very pale, often unbrowned exterior, and a creamy, slightly runny interior. An American-style omelette is usually folded in half or thirds, often has a more set interior, and can have a light golden color on the outside. Both are delicious, but require slightly different finishing techniques.

Who should use these perfect omelette techniques?

Anyone looking to improve their cooking skills, especially those wanting to create quick, nutritious, and versatile meals. It's perfect for beginners, home cooks, and even experienced chefs looking to refine their foundational egg preparations.

Are there any health risks associated with making omelettes?

When prepared correctly, omelettes pose no significant health risks. Ensure eggs are cooked through to avoid foodborne illness. If using high-fat fillings, be mindful of overall caloric and saturated fat intake, especially for those with cardiovascular concerns.

What's the future trend for omelette variations?

The future of omelettes likely lies in increasing global flavor fusions, plant-based egg alternatives for vegan options, and a continued emphasis on nutritious, locally sourced, and sustainable ingredients. Expect more adventurous fillings and cooking methods.

Ready to transform your breakfast routine and impress your palate? Dive into these beginner's guide to perfect omelette techniques and start crafting delicious, fluffy omelettes today. Your journey to omelette mastery begins now!

Topics: perfect omelette techniquesomelette recipe for beginnersfluffy omelette tipshealthy breakfast ideasegg cooking methods
Leo List
Brampton weed
Adultwork